Most of the time you don’t want to model the minutia of bolts, washers, nuts, etc from your imported parts and assembly files. If the part names come across upon import, the labels “MS”/ “NAS”/ “AN” standard hardware may clue you into what to remove from Geometry under the Model Info tree, but it is usually the case that it is an onerous task to manually remove what could be hundreds or thousands of these in a single file.
The best option is to remove these from the original CAD export. If the original export was done for you, by a design engineer for example, then make a request back to this individual to repeat the export with this hardware. Perhaps they have hardware as a unique branch of their assembly tree that can be suppressed prior to export. That’s the best option.
If you are stuck, though, here’s something you can try. The crux of this process is selecting solids, sorting by volume, then deleting those with the smallest volume. I’ll demonstrate in a simple model.
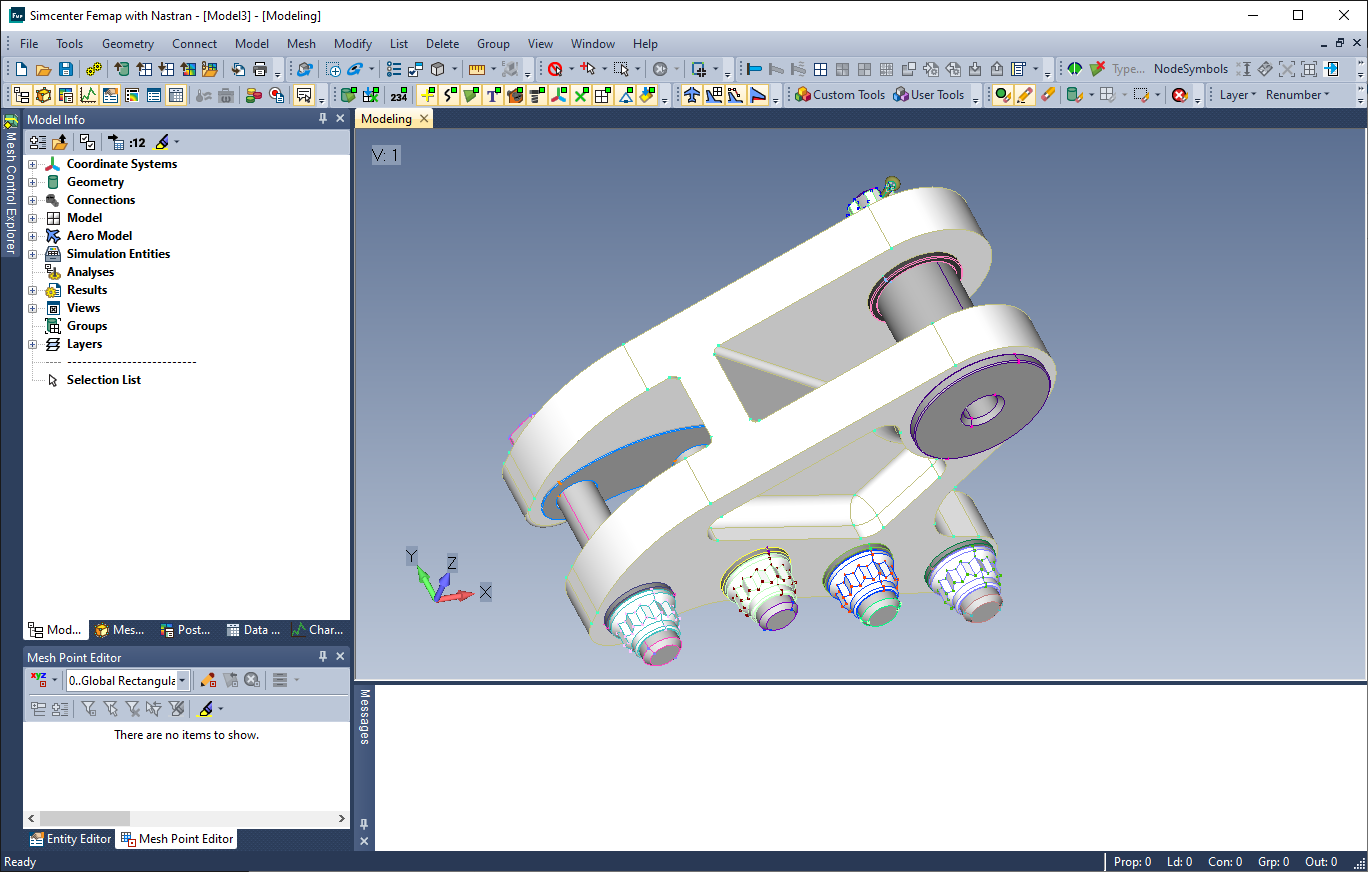
There are four NAS67 hex bolts in this assembly. We know we don’t want to model the bolts discretely if we are anticipating a rigid-cbush connection configuration, or a simple SPC constraint at the bolt holes; such assumptions are part of typical modeling best practices.
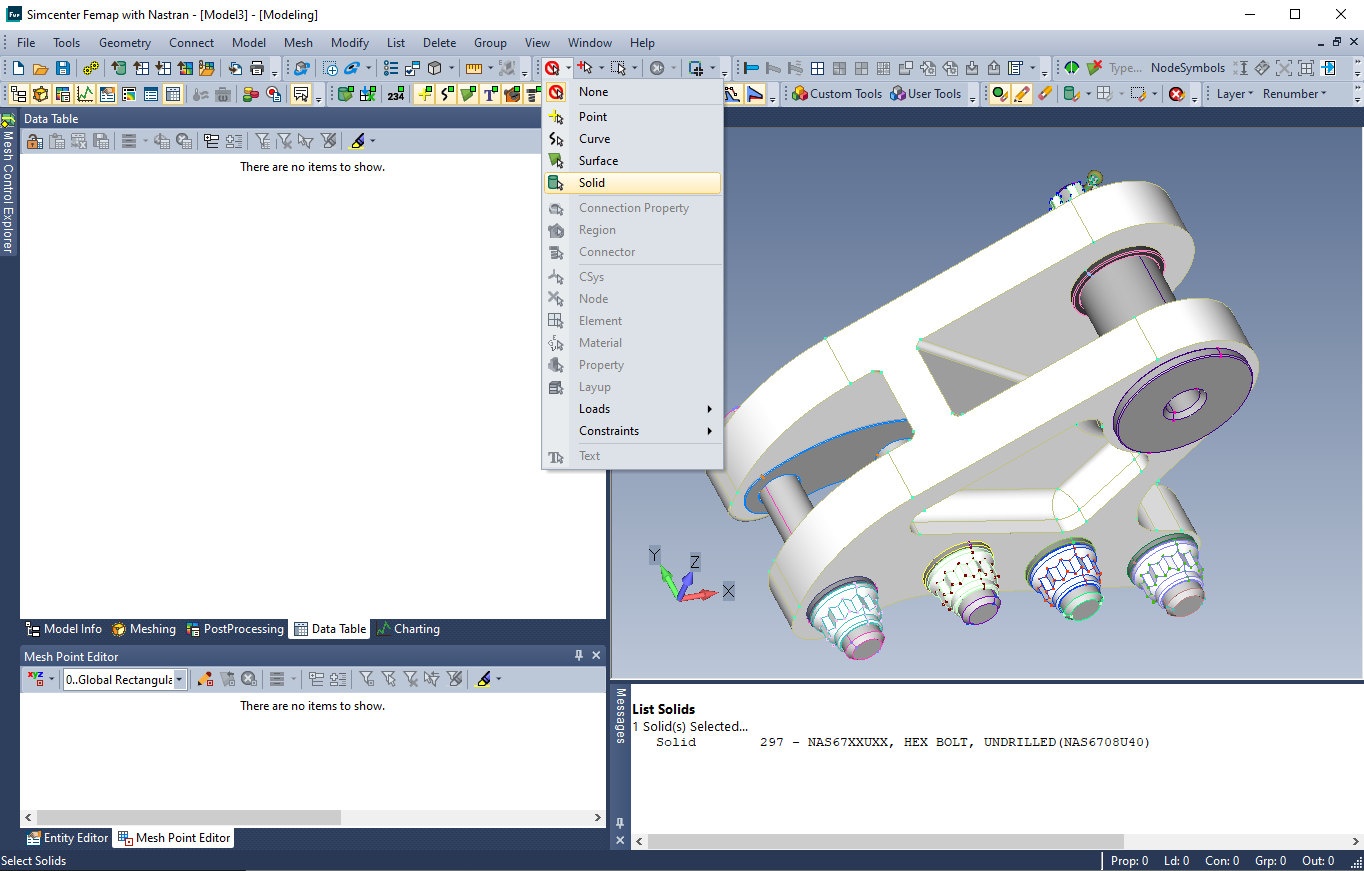
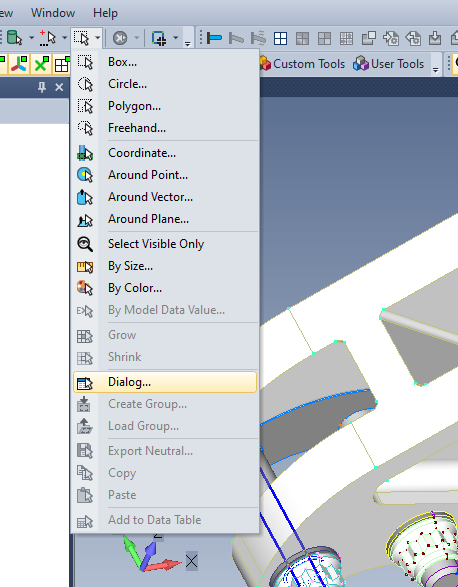
Let’s begin by ensuring the Data Table is shown (if not, use Tools –> Data Table). Then head to the Selector options in the top menu. Maybe you haven’t used the selector tool in Femap before (I have noticed many aren’t even aware of it’s existence!). We’ll work left to right here, first selecting the entity type, which also enables the Selector. The Selector will start off in a disabled mode with a crossed out circle icon. Use the drop down and select “Solid”:
Next, one icon to the right, we’ll set the mode to “Select Multiple”.
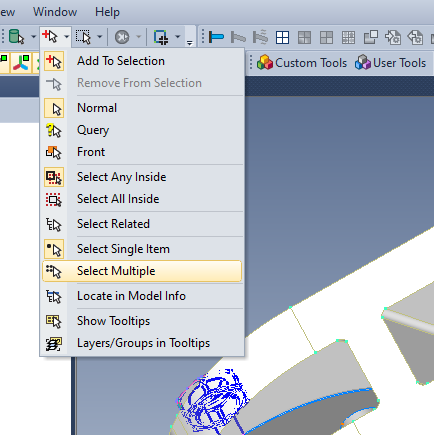
Finally, one more icon over is the Selector Actions. Select “Dialog” here.
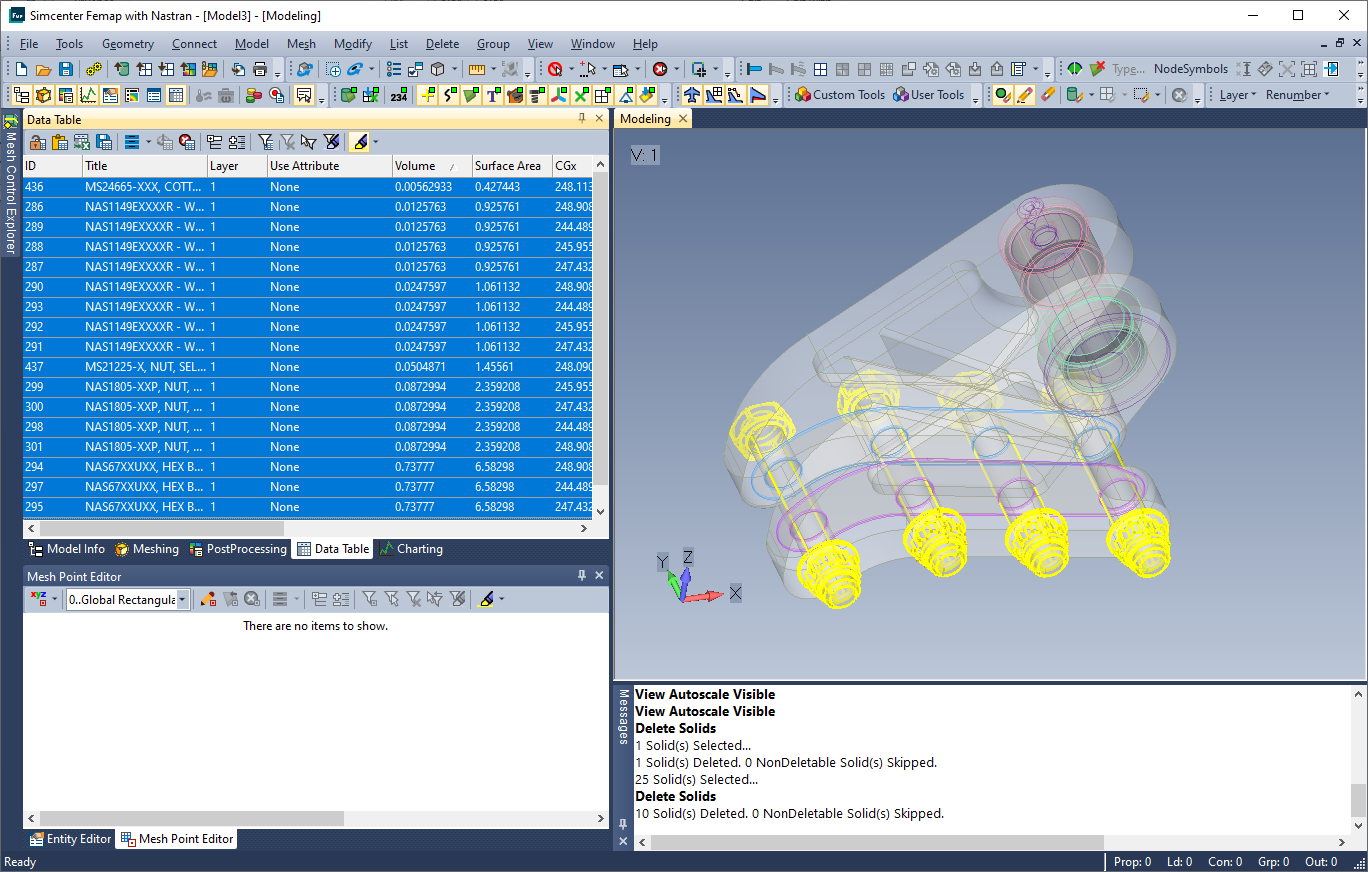
This brings up the Entity Selection dialog. Use “Select All” here.

You will notice all of the solids are listed in the Data Table. Now click the three blue box icon (filing cabinet?), and select “Add Mass Properties…”.

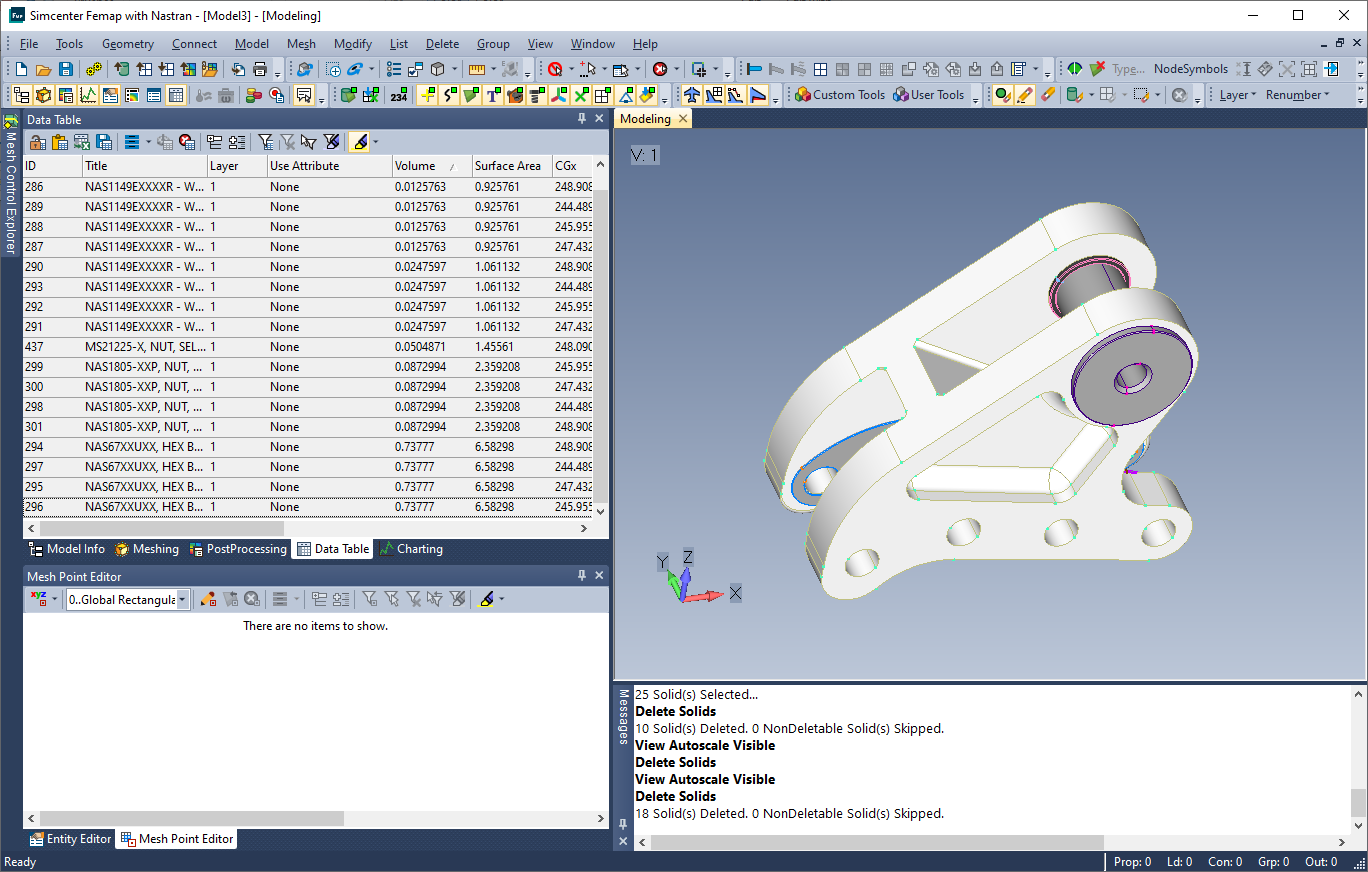
This option does different things depending on the entity type. For solids, you will see that you get Volume, Surface Area, CGx, etc. Here’s the trick. Sort the table by Volume by clicking on that column title.

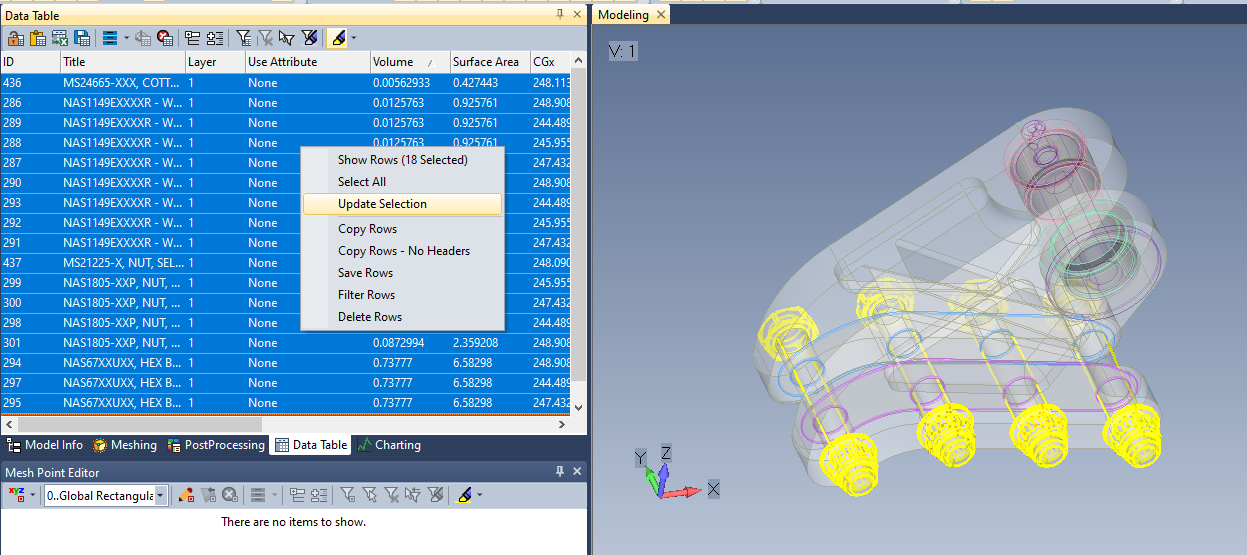
Now enable the Highlighting option (last icon in the row), and then select rows to observe the solids you have sorted by lowest volume. In my model, it clearly detected the fasteners I would like to remove.
With those rows highlighted, right click in the Data Table and from that menu select “Update Selection”. Now your Selector is updated with the fastener solids.
And now finish the task with Delete, Geometry, Solid.
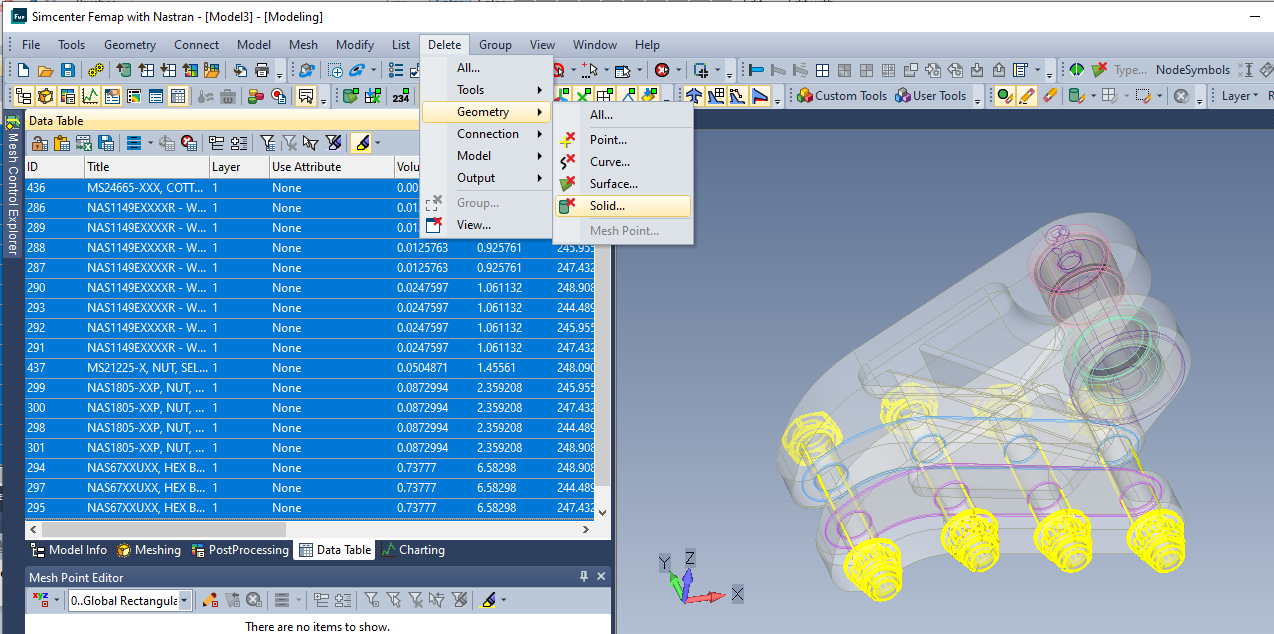
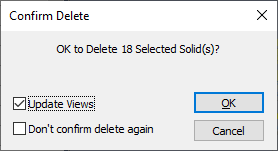
As they are already in the Selector, Femap skips opening a dialog and gets right to asking you if you want to delete these solids. Select “OK”.
And now you have a model cleaned of fasteners and the little hardware that can clog up your graphics rendering! Do be sure to understand the DOF transferred at each joint prior to starting this process, which can oftentimes be understood by studying of the joint cross section, for which the original solids are helpful.